There’s a special kind of joy in watching nature flourish under your care. When you embark on the journey of Peace Lily Propagation, you’re not merely replicating a plant—you’re nurturing a living piece of art that brings life, calm, and beauty to your space. Whether you’re a seasoned plant enthusiast or just starting out, this comprehensive guide will walk you through each step of the process, ensuring you achieve success with your propagation efforts.
In this article, you will learn how to propagate your peace lily using various methods, get expert advice on care and troubleshooting, and even discover a DIY fertilizer recipe to give your new plants the best possible start. Let’s dive in and transform your indoor gardening experience!
Table of Contents
Introduction: Unleashing the Beauty of Peace Lily Propagation
You remember that first time you saw a peace lily in full bloom—its lush, elegant leaves and graceful white blooms captivated you instantly. Propagating your peace lily not only lets you multiply this beauty but also allows you to connect with your natural surroundings on a deeper, personal level. In this guide, you will explore the secrets behind effective propagation and discover techniques that cater to both beginners and experts.
Through detailed steps and expert tips, you’ll learn what makes a thriving peace lily and how to troubleshoot common issues. Get ready to roll up your sleeves and dive into a process that’s as rewarding as it is enlightening.
Step 1 – Getting Started with Peace Lily Propagation

Understanding the Basics of Peace Lily Care
Before you begin your propagation journey, it’s essential to understand the fundamental needs of your peace lily. Knowing what these plants require for optimal growth will make it easier for you to replicate their success.
- Recognize Key Characteristics:
Understand what sets a peace lily apart by learning what are the key characteristics of peace lily plants. Their deep green leaves, elegant blooms, and subtle fragrance make them a centerpiece in any home. - Identify Warning Signs:
Be alert for signs such as Peace Lily Leaves Turning Yellow or Peace Lily Brown Tips. These symptoms can indicate overwatering, insufficient light, or nutrient imbalance. Recognizing these cues early can help you adjust your care routine promptly. - Basic Environmental Needs:
Ensure that your plant receives adequate indirect light and that its soil is well-draining. This is crucial because a well-cared-for plant provides the healthiest material for propagation. Always remember that your success with Peace Lily Propagation starts with a deep understanding of peace lily care.
Setting Clear Goals for Your Propagation Journey
When you begin propagating, it’s important to set clear, achievable goals:
- Visualize Success:
Think about what a thriving, multiplied peace lily looks like in your space. Your goal might be to create a mini indoor garden or to share new plants with friends and family. - Define Your Process:
Write down your expectations and outline the steps you plan to follow. This can include creating a schedule for watering, monitoring growth, and adjusting care as needed. - Stay Patient:
Propagation is an art that requires time and dedication. Even if progress seems slow at first, remember that consistency in care will eventually reward you with a vibrant, flourishing plant.
Step 2 – Preparation: Tools, Techniques, and Methods
Choosing Your Method: Different Ways to Propagate
There are several methods for propagating your peace lily, and selecting the right one depends on your comfort level and the available resources. Here’s a comparison to help you decide:
- Leaf Cutting Method:
If you’re wondering how to propagate peace lily from leaf in water, this method is ideal. It involves placing a leaf cutting in water until roots emerge, and it’s one of the simplest methods to start with. - Seed Propagation:
Some enthusiasts prefer starting from scratch. If you’re curious about how to propagate peace lily from seed, this method allows you to grow a new plant from collected seeds, though it typically takes longer to see results. - Stem Division:
For those with a larger, established plant, consider peace lily propagation from stem. This technique involves cutting the plant into sections, each with its own set of roots and leaves. It’s particularly effective when you need to manage an overgrown plant. - Growing from Bulb:
Another interesting method is learning how to grow peace lily from bulb. While not as common, this approach offers a unique way to expand your indoor garden.
Gathering Your Materials and Setting Up Your Workspace
Before starting, ensure you have all the necessary tools and a clean workspace. This helps prevent contamination and ensures the highest chance of successful propagation.
- Essential Tools:
- Pruning Shears: Use sharp, sterile shears to make clean cuts.
- Containers: Small pots or jars, depending on your propagation method.
- Water and Rocks: If you’re using the water propagation method, gather a clear container and some small, smooth rocks for stability.
- Propagation Medium: Prepare a well-draining potting mix if you’re planning to transfer your cuttings to soil later.
- Organize Your Space:
Choose a well-lit, calm area in your home. A dedicated workspace ensures that you can focus on the details and keep track of your progress. - Sanitize Your Tools:
Always sanitize your tools before use. This minimizes the risk of transferring diseases to your peace lily and ensures a healthy environment for new growth.
Step 3 – The Propagation Process: Detailed How-To Guide

Propagation from Different Parts of the Plant
Now it’s time to get hands-on. Here’s a detailed guide to each propagation method:
Method 1: Propagating from Leaf in Water
- Cutting the Leaf:
Carefully cut a healthy leaf from your peace lily using sterilized pruning shears. Make sure the cut is clean and at an angle to encourage water uptake. - Water Setup:
Place the cutting in a container filled with clean water. Optionally, arrange a few small rocks around the base to keep the leaf stable. - Wait and Watch:
Change the water every few days and monitor the cutting for signs of root development. Patience is key—roots may begin to form within a couple of weeks. - Transplanting:
Once roots are well-established, gently transfer the cutting into a prepared pot with nutrient-rich soil.
Method 2: Propagation from Seed
- Collecting Seeds:
Learn how to collect peace lily seeds from mature blooms. Gently gather seeds and allow them to dry. - Preparing the Soil:
Use a seed-starting mix that is light and well-draining. Moisten the soil before planting. - Planting:
Sow the seeds on the surface of the soil, then cover lightly with a thin layer of additional mix. - Creating a Mini Greenhouse:
Cover the pot with plastic wrap to maintain humidity, and place it in a warm, bright location. - Germination:
Check the seeds regularly. Once the seedlings emerge, remove the cover and provide them with gentle, indirect light.
Method 3: Propagation from Stem

- Identify the Stem:
Look for a section of the plant that has several leaves and a healthy stem. - Make the Cut:
Use sterilized shears to cut the stem just below a node—the point where a leaf attaches. - Rooting in Water or Soil:
You can either place the stem in water to encourage root development or plant it directly in moist soil. The water method is similar to the leaf propagation process. - Monitor Growth:
Keep an eye on the cutting for the emergence of new roots. Once it appears, gradually acclimate it to a more solid medium if started in water.
Method 4: Growing from Bulb (Less Common)
- Locate the Bulb:
Some peace lilies can produce small bulbs at the base of the plant. Carefully remove one using clean tools. - Planting:
Place the bulb in a pot with fresh soil. Ensure the top of the bulb remains just above the soil line. - Nurturing:
Water gently and provide moderate light until the bulb begins to sprout new leaves.
Advanced Techniques: Splitting and Separating an Overgrown Plant
For a more hands-on approach, you might decide to split or separate an overgrown peace lily. Here’s how:
- Splitting a Peace Lily:
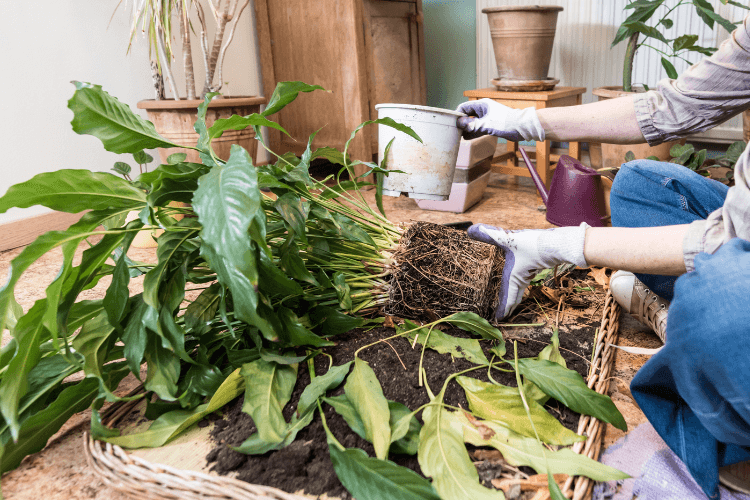
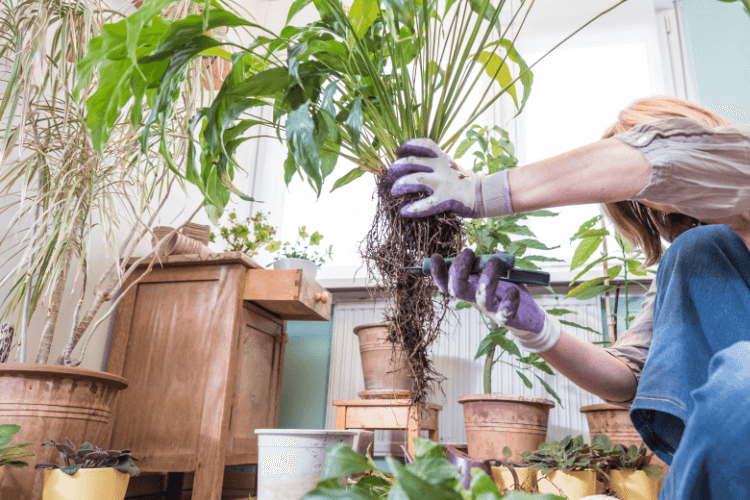
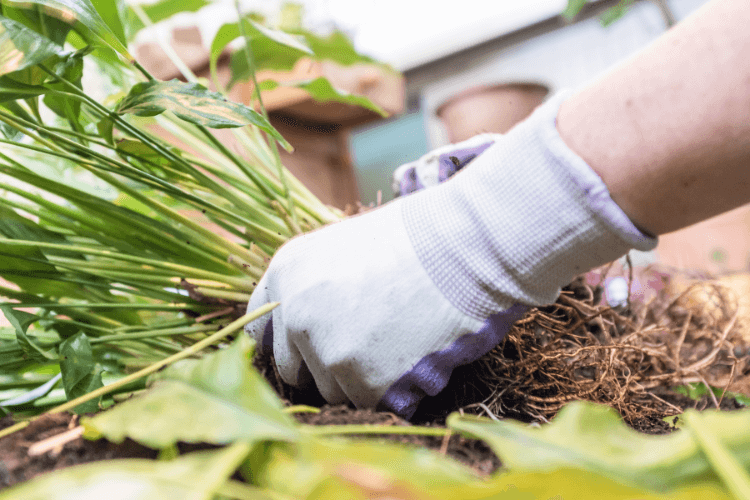
When your plant becomes too crowded, use the how to split a peace lily technique. Gently remove the plant from its pot, then divide it into sections with each segment containing a healthy set of roots and leaves. - Separating Overgrown Plants:
If you’re dealing with an overgrown peace lily, learn how to separate an overgrown peace lily carefully to ensure that each piece can thrive on its own. This method not only rejuvenates the plant but also gives you multiple new plants to care for. - Ensuring Minimal Stress:
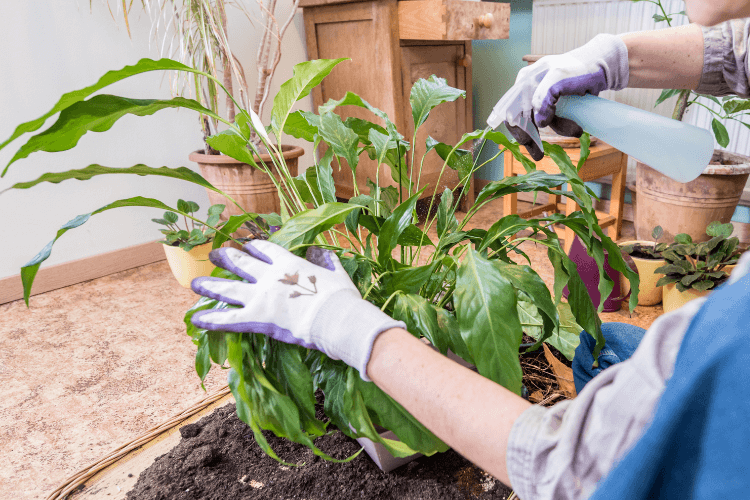
Handle each section with care to minimize stress. Providing extra moisture and a gentle environment post-split can help ease the transition.
Step 4 – Post-Propagation Care and Nurturing New Growth

Once you’ve successfully propagated your peace lily, nurturing the new growth is just as important as the initial steps. This phase is where your care and consistency will really pay off.
Essential Care Tips for New Plants
- Watering:
Ensure that your new plants receive regular, moderate watering. Avoid overwatering by checking that the soil remains moist but not waterlogged. - Light Requirements:
Your peace lily thrives on bright, indirect light. Adjust your plant’s location to avoid direct sunlight which can scorch the leaves. - Fertilizing:
Use a balanced fertilizer to provide necessary nutrients. A gentle feeding schedule will help prevent issues like Peace Lily Brown Leaves or Peace Lily Leaves Turning Brown. - Observation:
Watch for any signs of stress, such as yellowing leaves or browning tips. Early intervention can save your plant from serious issues.
Environmental Considerations for Long-Term Growth
Your environment plays a significant role in the health of your peace lily. Consider the following tips to create the ideal setting:
- Temperature and Humidity:
Peace lilies do well in a stable, warm environment. Maintain a consistent room temperature and consider using a humidifier if your indoor air is dry. This is especially important for those looking to cultivate White Anthurium Peace Lily Temperature Tolerance. - Soil Quality:
Use a high-quality, well-draining potting mix. Proper soil composition supports healthy root development and overall plant vigor. - Regular Maintenance:
Stay on top of your plant care routine by regularly cleaning the leaves and repotting as needed. Learn how to repot a peace lily to avoid root crowding and promote healthy growth.
DIY Fertilizer Recipe for Optimal Growth
Proper nutrition is the cornerstone of any thriving plant. Here’s a simple recipe to create your own organic fertilizer, tailored specifically for Peace Lily Propagation:
Nutrient Recipe Table
| Ingredient | Quantity | Benefits |
|---|---|---|
| Organic Compost | 1 cup | Rich in nutrients; improves soil structure |
| Diluted Fish Emulsion | 2 tablespoons | Provides fast-acting nutrients for root growth |
| Eggshell Powder | 1 teaspoon | Adds calcium to strengthen cell walls |
| Banana Peel Extract | 2 tablespoons | Boosts overall plant vigor and promotes growth |
| Water | 1 liter | Ensures even distribution of nutrients |
Mix these ingredients well and apply a small amount to the soil during repotting or as a periodic supplement. This DIY approach not only saves money but also gives your plant the natural boost it needs to thrive.
Step 5 – Troubleshooting and Expert Tips for Peace Lily Propagation
Every gardening journey comes with its unique challenges. Here are some common issues you might face and expert advice to overcome them:
Common Challenges and Their Solutions
- Overwatering and Nutrient Imbalance:
If you notice Peace Lily Yellow Leaves or Peace Lily Brown Tips, it might be due to overwatering or a nutrient imbalance. Adjust your watering schedule and ensure you’re using the proper soil mix. - Crowded Growth:
When your plant starts showing signs of stress because it’s too crowded, follow the how to separate an overgrown peace lily method. This involves carefully splitting the plant to allow each section enough space to breathe. - Pest Prevention:
Although peace lilies are generally resilient, keep an eye out for pests. Use natural remedies and ensure your propagation area is clean and free of debris. - Pet Safety:
Remember that peace lilies can be toxic if ingested. If you have pets at home, make sure they are kept away from areas where you are propagating your peace lily. This addresses concerns like Are Peace Lilies Toxic to Cats and Are Peace Lilies Toxic to Dogs.
Expert Tips and Creative Ideas
- Be Consistent:
The key to successful Peace Lily Propagation is consistency. Maintain a regular schedule for watering, feeding, and checking on the progress of your cuttings. - Experiment with Methods:
Don’t be afraid to try different propagation techniques. Whether you’re curious about propagate peace lily from leaf in water or prefer the direct approach of peace lily propagation from stem, experimenting will help you discover what works best for your unique situation. - Personal Touch:
Add your own creative twist to the process. Consider maintaining a journal to track your plant’s growth, and don’t hesitate to share your success stories with fellow enthusiasts online. - Consult Additional Resources:
If you encounter persistent issues, look for community forums, trusted gardening blogs, or local experts who can provide tailored advice on Peace Lily Plant Care and troubleshooting.
FAQ: Peace Lily Propagation and Related Care
Frequently Asked Questions
- Q1: How do I propagate peace lily from leaf in water effectively?
A: Start by selecting a healthy leaf and cutting it with sterile tools. Place the leaf in a container with clean water, adding a few small rocks for stability. Change the water regularly and wait for roots to form. With patience and proper care, you’ll see results in just a few weeks. - Q2: What are the signs that my propagation is successful?
A: Look for emerging roots and new leaf growth. Slight yellowing might occur initially, but once the cutting adapts, you should see vibrant green growth. Monitoring these signs early helps you adjust your care routine if needed. - Q3: Can I propagate peace lily from seed?
A: Yes, although it’s a slower process. Gather seeds from mature blooms, use a light seed-starting mix, and maintain a warm, humid environment. With consistent care, your seedlings will eventually emerge and develop into healthy plants. - Q4: How do I split a peace lily when it becomes overcrowded?
A: Gently remove the plant from its pot and divide it into sections. Each section should have its own set of roots and leaves. Handle each piece with care to minimize shock and ensure a smooth transition into new pots. - Q5: Are Peace Lilies Toxic to Cats or Dogs?
A: Yes, peace lilies are toxic if ingested by pets. Always keep your propagation area and finished plants out of reach of your cats and dogs.
Conclusion: Embrace the Journey of Peace Lily Propagation
As you reflect on the steps outlined above, remember that Peace Lily Propagation is more than just a gardening technique—it’s an art form that nurtures life, enhances your living space, and connects you to nature in a profound way. Every step, from understanding the basics of care to experimenting with advanced propagation methods, is an opportunity for learning and growth.
Your journey starts with a single, carefully chosen leaf or cutting and blossoms into a thriving collection of plants that are a testament to your dedication and care. With each new shoot, you’re not just multiplying a plant; you’re cultivating a sanctuary of calm and beauty in your own home.
Take action today by gathering your tools, setting up your workspace, and choosing the propagation method that excites you the most. Remember, each step is a learning process, and even small setbacks are just stepping stones to success.
Call-to-Action
Now that you’re armed with the knowledge of how to propagate your peace lily, it’s time to put your newfound skills to the test! Grab your tools, select your propagation method, and start your journey towards creating a greener, more vibrant indoor garden. Share your experiences and progress in the comments below, or join our community of plant enthusiasts for ongoing tips and inspiration. Your passion for plants has the power to transform your living space—start today and watch your indoor garden flourish!
By following these five easy steps and integrating expert care tips, you can master the art of Peace Lily Propagation. From understanding the basic requirements of your peace lily to troubleshooting common issues and even trying out a DIY fertilizer recipe, this guide covers every aspect of the propagation process. Each section is designed to provide you with actionable advice that’s easy to follow, ensuring that you achieve success and enjoy every moment of nurturing your plants.
Remember, your journey in indoor gardening is unique and personal. Each propagation technique, whether it’s how to propagate peace lily from seed or peace lily propagation from stem, adds a new dimension to your gardening skills and enriches your experience as you create a natural haven right at home.
Embrace the process, be patient with your progress, and let your creativity flourish alongside your plants. Every time you water, repot, or even troubleshoot, you are investing in a healthier, more beautiful environment. Enjoy the process, learn from every challenge, and soon enough, your home will be filled with the lush, thriving presence of peace lilies.
Additional Tips for Long-Term Success
- Stay Updated on Trends:
Indoor gardening techniques evolve, and staying informed about new methods and tools can enhance your propagation success. Subscribe to gardening blogs or join local plant clubs to exchange ideas and advice. - Experiment and Learn:
Don’t hesitate to try variations on the techniques described here. Experimenting with different propagation mediums, such as using a mix of water and small pebbles, can yield surprising results. Every experiment is a step towards mastering your craft. - Keep a Garden Journal:
Documenting your progress can help you notice patterns and adjust your care routine accordingly. Record when you water, fertilize, or repot your peace lilies and note any changes in growth or appearance. This ongoing record can become an invaluable resource as you refine your propagation techniques. - Engage with the Community:
Sharing your success stories and challenges can inspire others and help you gain fresh insights. Online forums and social media groups dedicated to indoor gardening are excellent places to ask questions, share photos, and receive feedback from fellow plant enthusiasts.
In conclusion, your journey into Peace Lily Propagation is a blend of science, art, and personal expression. By applying these steps and strategies, you are setting yourself up for a rewarding and enriching experience. So, go ahead—embrace the beauty of nature, and let every leaf you nurture be a testament to your care and creativity. Your indoor garden awaits its transformation!
By following this detailed guide, you are well on your way to mastering the art of Peace Lily Propagation. With careful preparation, consistent care, and a willingness to experiment, you’ll soon see your efforts blossom into a vibrant collection of peace lilies that enhance your home and bring you endless satisfaction.
Get started today, and remember: every thriving plant began with a single, dedicated effort—just like yours.

