
Have you ever felt the thrill of watching a tiny green shoot transform into a thriving, vibrant plant right before your eyes? If you’re passionate about plants and eager to extend your green family, you’re in the right place. In this guide, you’ll discover How to Propagate Spider Plant in a way that not only nurtures your botanical companion but also brings you closer to nature. This step-by-step article is designed with you in mind, offering both a personal connection and practical, well-researched advice to ensure that your spider plant propagation journey is a blooming success.
Table of Contents
Understanding Your Spider Plant and Its Benefits
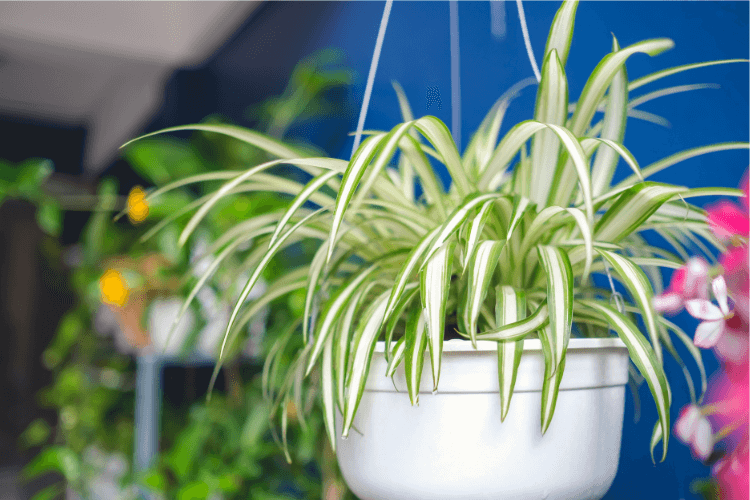
Before diving into the propagation process, it’s essential to appreciate the unique qualities of your spider plant. Known for its arching leaves and ease of care, the spider plant is a favorite among indoor gardeners. Whether you’re a beginner or a seasoned plant parent, understanding the core benefits of your plant sets the stage for successful propagation.
The Origins and Appeal of Spider Plants
Spider plants, also known as Chlorophytum comosum, have charmed plant lovers worldwide with their graceful, cascading foliage. They come in various types of spider plants, each with its own subtle differences in leaf pattern and color. As you learn how to propagate spider plant, take a moment to admire the natural beauty and resilience that has made these plants a household staple.
Spider Plant Benefits
- Air Purification: Spider plants are renowned for their ability to clean indoor air, removing toxins and contributing to a healthier living environment.
- Easy Care: They thrive in indirect sunlight and can tolerate periods of neglect, making them perfect for busy lifestyles.
- Aesthetic Appeal: With their striking appearance and graceful leaves, spider plants add a touch of elegance to any room.
- Low Toxicity: If you’re wondering, are spider plants toxic to cats? or are spider plants poisonous to dogs? rest assured, these plants are generally safe for your furry friends.
Understanding these benefits will not only inspire you to care for your plant but also remind you why propagation is such a rewarding endeavor.
Preparing for Propagation: Essential Tools & Ingredients

Success in propagating your spider plant starts with the right tools and a well-planned approach. Whether you choose water or soil as your medium, gathering all the necessary materials ahead of time ensures a smooth process.
Tools and Materials You’ll Need
When planning to propagate a spider plant, make sure you have:
- Clean Water: Essential for water propagation. Ensure you change it every 2-3 days to prevent bacterial growth.
- Sharp Scissors or Pruning Shears: To make a clean, precise cut when removing offshoots.
- Well-Draining Spider Plant Soil: If you’re opting for soil propagation, select a soil mix that supports healthy root growth.
- Small Pots: For repotting your new plants once roots have established.
- Optional: Rooting hormone to give your cuttings an extra boost (though not necessary for spider plants).
Propagation Tools & Ingredients Table
| Tool/Ingredient | Description | Notes |
|---|---|---|
| Clean Water | For water propagation | Change every 2-3 days |
| Sharp Scissors/Pruning Shears | To cut healthy offshoots | Sterilize before use to prevent infection |
| Well-draining Spider Plant Soil | Suitable for soil propagation | Ensure soil has proper drainage |
| Small Pots | For repotting the new spider plants | Use pots with drainage holes |
| Optional: Rooting Hormone | To encourage root growth in cuttings | Not mandatory, but can be beneficial |
This table provides a quick reference so you can check that all necessary tools are on hand before you begin your propagation adventure.
Step-by-Step Guide: How to Propagate Spider Plant in 5 Simple Steps for Success
Now that you’re fully prepared, it’s time to learn how to propagate spider plant using a straightforward, five-step process. Each step is designed to ensure that your new plants develop strong roots and flourish into healthy additions to your indoor garden.
Step 1: Identify the Offshoots and Assess Plant Health
Your spider plant produces offshoots—small baby plants that naturally develop from the main plant. These offshoots are your starting point for propagation.
- Key Actions:
- Inspect Your Plant: Look for offshoots with visible roots and vibrant, healthy leaves. Avoid any that appear weak or damaged.
- Consider the Timing: Propagation is best done when your plant is in its active growing phase, ensuring the offshoots are robust and ready to grow.
By carefully choosing offshoots, you set the foundation for a successful propagation process.
Step 2: Choosing Your Propagation Method: Water vs. Soil
There are two primary methods for spider plant propagation: water and soil. Each method has its advantages, and the choice depends on your personal preference and the conditions of your home.
- Water Propagation:
- Benefits: Allows you to observe root development clearly and is generally mess-free.
- Process: Place the offshoot in a glass of clean water and change the water regularly.
- Soil Propagation:
- Benefits: Mimics natural conditions and may result in a quicker transition to a potted plant.
- Process: Plant the offshoot directly into well-draining spider plant soil.
Consider your space, time, and preference for monitoring growth as you choose the best method for you.
Step 3: Propagation Process in Water
Water propagation is a popular choice because it’s simple and visually rewarding.
- Detailed Instructions:
- Clean the Offshoot: Use sterilized scissors to make a clean cut at the base of the offshoot.
- Submerge in Water: Place the offshoot in a glass or jar filled with clean water, ensuring that only the base is submerged.
- Monitor Growth: Place the container in a spot with bright, indirect light. Watch as roots begin to develop, which can take anywhere from a few days to a couple of weeks.
- Transition to Soil: Once the roots are at least a couple of inches long, you can transfer the cutting to a small pot filled with spider plant soil.
- Bullet Points for Quick Reference:
- Change water every 2-3 days.
- Keep the water container clean.
- Ensure consistent light exposure.
Following these steps will help you achieve a thriving propagated spider plant that’s ready for its new home.
Step 4: Propagation Process in Soil
If you prefer soil propagation, this method closely replicates natural growing conditions and can yield equally impressive results.
- Detailed Instructions:
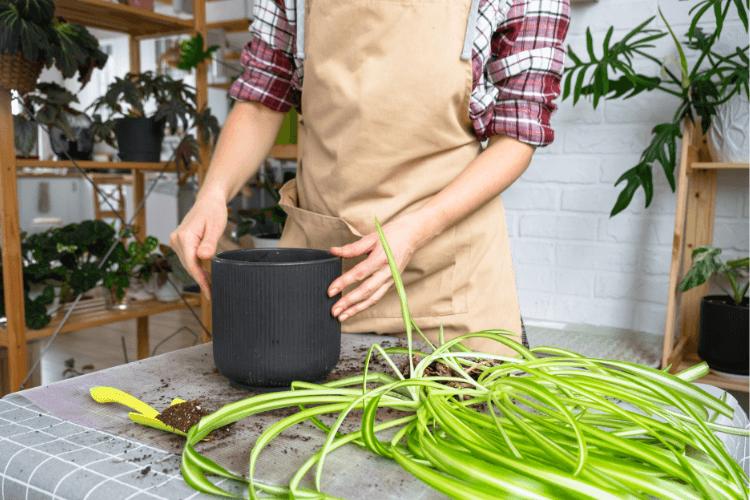
- Prepare the Pot: Fill a small pot with well-draining spider plant soil.
- Plant the Offshoot: Gently insert the offshoot into the soil, ensuring that its base is firmly planted.
- Water Carefully: Give the new plant a light watering, making sure the soil is moist but not waterlogged.
- Create a Humid Environment: Covering the pot with a plastic bag for a few days can help retain moisture and encourage root development.
- Place in Bright, Indirect Light: Just like water propagation, indirect light is key to success.
- Additional Tips:
- Monitor the plant for any signs of distress, such as spider plant brown tips or spider plant yellow leaves, which could indicate overwatering or nutrient deficiencies.
This method is ideal if you’re ready to see your plant settle into its new pot and grow naturally.
Step 5: Caring for Your Newly Propagated Spider Plant
The final step in your propagation journey involves ongoing care to ensure that your new spider plant continues to thrive.
- Key Care Guidelines:
- Watering Routine: Learn how often to water spider plant based on the method you chose. Generally, a light watering every week is sufficient, but adjust if the plant shows signs of drought.
- Light Requirements: Spider plants do best with bright, indirect light. Keep in mind the spider plant light requirements to avoid issues like leaf burn or stunted growth.
- Repotting Considerations: As your propagated spider plant grows, consider when to repot it to a larger container. Repotting gives the plant more room to develop and ensures continued health.
- Monitoring Growth: Keep an eye on the plant for any abnormalities. Watch out for spider plant brown tips or spider plant yellow leaves, which may signal a need for care adjustments.
- Quick Checklist for Ongoing Care:
- Adjust watering based on seasonal changes.
- Provide adequate but indirect light.
- Use nutrient-rich soil for sustained growth.
- Inspect leaves regularly for early signs of issues.
By following these care tips, you’ll ensure that your propagated spider plant transitions smoothly from a cutting into a flourishing part of your indoor garden.
Troubleshooting Common Issues in Spider Plant Propagation
Even with careful planning, you might encounter challenges along the way. Don’t worry—addressing common issues early can make all the difference in the success of your propagation efforts.
Identifying Issues Early
- Spider Plant Brown Tips: This can be a sign of overwatering or low humidity. Ensure your plant isn’t sitting in water and adjust your watering schedule accordingly.
- Spider Plant Yellow Leaves: Yellowing may indicate nutrient deficiencies or improper light exposure. Evaluate your care routine to determine if the plant needs a change in soil or light conditions.
- Spider Plant Bloom Issues: If your spider plant isn’t blooming as expected, it might be receiving too little light or not enough nutrients. Adjust your environment to see an improvement.
Effective Solutions and Adjustments
- Watering Adjustments: If you notice how often to water spider plant seems to be off, try reducing or increasing water frequency based on the observed signs.
- Soil and Nutrients: Make sure you’re using the correct spider plant soil. A mix that drains well while retaining enough moisture is ideal.
- Light Exposure: Ensure that your plant is not in direct sunlight, which can scorch leaves, but that it receives enough bright, indirect light to flourish.
By taking a proactive approach and making these adjustments, you can resolve issues before they impact the long-term health of your spider plant.
Additional Tips for a Thriving Spider Plant
Taking your spider plant care to the next level can transform your indoor garden into a vibrant and sustainable oasis. Here are some extra tips to maximize the potential of your green companion.
Best Practices for Light, Water, and Soil
- Light: Your spider plant thrives in bright, indirect light. Place it near a window where it can enjoy diffused sunlight. This is crucial because do spider plants need sun? While they do require light, direct sunlight can be harsh.
- Water: Establish a consistent watering routine. Remember, overwatering can lead to spider plant yellow leaves or even root rot. A good rule of thumb is to water when the top inch of soil feels dry.
- Soil: Opt for well-draining spider plant soil. A mix with organic matter that promotes both drainage and moisture retention is ideal for robust growth.
Repotting and Long-Term Growth
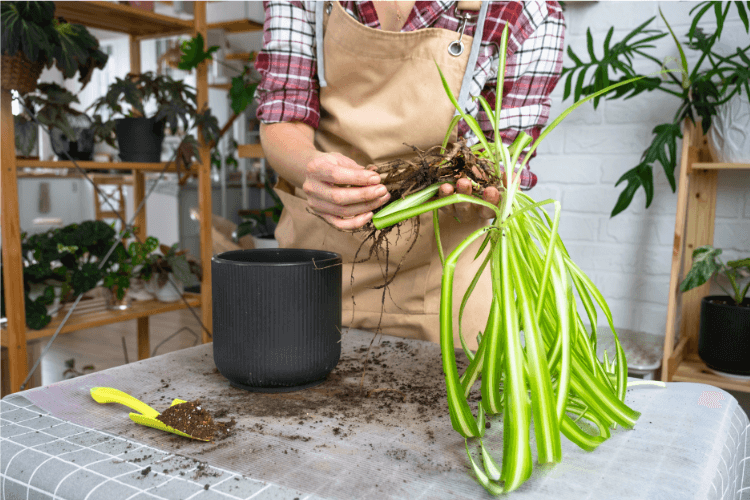
- When to Repot: Once your propagated spider plant has established a solid root system and outgrown its current container, it’s time to consider repotting spider plant. A larger pot provides extra room for roots to expand and can rejuvenate the plant’s overall health.
- How to Repot: Gently remove the plant from its current pot, tease out the roots if they are densely packed, and transfer it to a new pot with fresh, nutrient-rich soil.
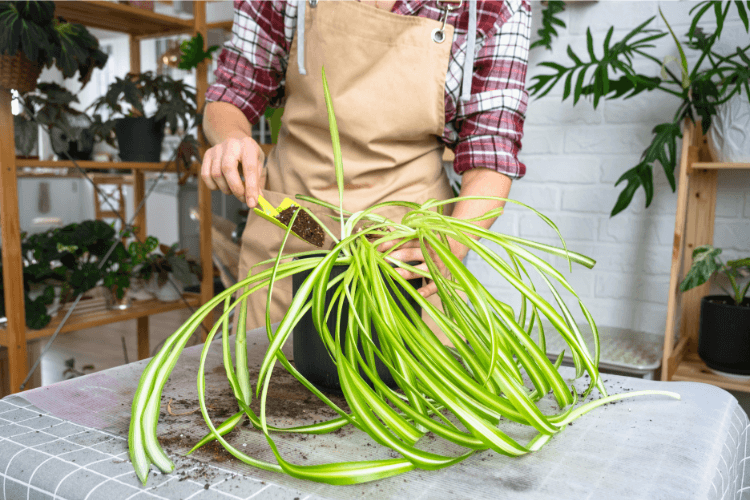
- Long-Term Maintenance: Regularly inspect your plant and trim any dead or damaged leaves to encourage new growth. This helps prevent issues like spider plant brown tips and maintains an appealing aesthetic.
FAQ Section: How to Propagate Spider Plant
In this section, we address some of the most common questions you might have while exploring How to Propagate Spider Plant. Each answer is crafted to provide clear and concise guidance.
- Q1: How do I propagate spider plant?
A: To propagate your spider plant, identify healthy offshoots, choose a propagation method (water or soil), and follow the detailed steps provided. Whether you opt for water propagation—where you can watch roots form in a clear container—or soil propagation, ensure you provide consistent care and the proper environment. - Q2: How to propagate spider plant in water?
A: Start by cutting a healthy offshoot with visible roots using sterilized scissors. Place the offshoot in a container of clean water and change the water every few days. Once the roots grow a few inches, transfer the cutting to a pot with well-draining spider plant soil. - Q3: Are spider plants toxic to cats or dogs?
A: No, spider plants are generally safe for both cats and dogs. However, while they are non-toxic, it’s best to discourage your pets from nibbling on the leaves excessively. - Q4: What are the best practices for spider plant propagation?
A: Use clean, sharp tools when cutting offshoots, choose the appropriate propagation method for your environment, and maintain a consistent care routine with the right balance of light, water, and nutrients. Monitor for signs of distress, such as spider plant brown tips or spider plant yellow leaves, and adjust care accordingly. - Q5: How often should I water my spider plant during propagation?
A: When propagating, water sparingly until the roots are established. Once the new plant is in soil, water only when the top inch feels dry. This approach helps prevent overwatering and promotes healthy root growth.
Conclusion and Your Next Steps
In conclusion, learning How to Propagate Spider Plant is not just a gardening technique—it’s a fulfilling journey that connects you with nature and enhances your indoor space. By understanding your plant, preparing adequately, and following the step-by-step propagation process, you’re setting the stage for success. Remember, the joy of watching a small offshoot grow into a thriving plant is immeasurable, and the benefits—from improved air quality to the sheer beauty of your spider plant—are worth every effort.
Your Call to Action
Now that you have the knowledge and steps to propagate your spider plant successfully, it’s time to put your skills to work. Gather your tools, select your healthiest offshoots, and start the propagation process today. Share your progress, ask questions, and connect with a community of fellow plant enthusiasts. Your journey doesn’t end here—each propagation is a chance to experiment, learn, and celebrate the wonder of plant life.
Remember, the next time someone asks you, How to Propagate Spider Plant, you’ll have all the answers and practical experience to guide them. Embrace the process, and watch your indoor garden flourish!
By following this comprehensive guide, you’re not only boosting your gardening skills but also enhancing your home environment with a plant that brings both beauty and health benefits. Whether you choose to propagate in water or soil, the steps outlined above will help you nurture a thriving, vibrant spider plant that reflects your care and dedication. So go ahead—start your propagation journey and let your green thumb shine.
Additional Tips Recap:
- Preparation is Key: Ensure you have all your tools ready before starting. A table of essential items is a great way to check off your list.
- Choose the Right Method: Understand the benefits of water versus soil propagation. Your personal preferences and home conditions will determine which method suits you best.
- Regular Care: Monitor your plant’s growth and adjust water, light, and nutrients as needed. Pay attention to any signs of distress, and make timely changes.
- Learn and Share: Engage with fellow plant enthusiasts and share your progress. The community aspect of plant propagation can provide additional insights and encouragement.
Final Thoughts:
Propagation isn’t just about creating new plants—it’s about cultivating a connection with nature and transforming your indoor space into a lively, refreshing oasis. With the steps and tips provided in this guide, you are fully equipped to tackle How to Propagate Spider Plant with confidence and creativity. Enjoy the journey, celebrate each small victory, and watch your garden grow!
Your spider plant is more than just a decorative piece—it’s a testament to your care and passion for nature. As you embark on this propagation adventure, remember that every cut, every new root, and every leaf is a step toward a greener, healthier home. So, grab your tools, follow the steps, and let your spider plant’s story unfold in the best possible way.
Final Checklist for Successful Propagation
- Step 1: Identify and choose healthy offshoots.
- Step 2: Decide on your preferred propagation method: water or soil.
- Step 3: Follow the detailed process for your chosen method.
- Step 4: Provide consistent care, ensuring proper watering and light exposure.
- Step 5: Monitor for any issues such as brown tips or yellow leaves and adjust accordingly.
- Step 6: Repot when necessary to give your propagated spider plant room to grow.
Armed with this knowledge, you’re now ready to turn your propagation dreams into reality. Don’t hesitate—start today, and soon you’ll be reaping the benefits of a flourishing, green indoor paradise.
Thank you for reading this guide on How to Propagate Spider Plant: 5 Simple Steps for Success. If you found this article helpful, please share it with other plant enthusiasts, leave a comment with your experiences, and subscribe for more gardening tips and tricks. Your next green success story begins now—happy propagating!