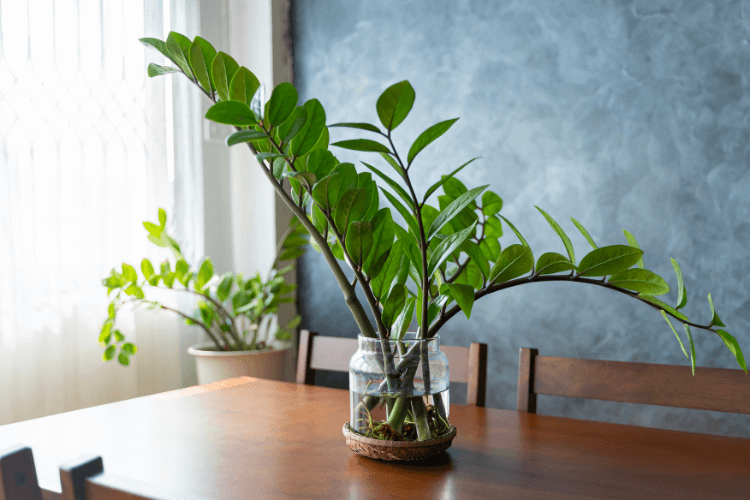
Have you ever felt the thrill of nurturing a plant that not only survives but thrives in your care? You might remember the excitement of watching a small green shoot grow into a lush, vibrant specimen that enlivens every corner of your space. If you’ve ever wondered How to Propagate ZZ Plant and multiply its beauty throughout your home or garden, you’re in the right place. In this guide, you’ll discover three easy methods to propagate your ZZ plant quickly and effectively—each technique tailored to your unique gardening style.
Table of Contents
Introduction to ZZ Plant Propagation
ZZ plants (Zamioculcas zamiifolia) are renowned for their glossy, hearty leaves and ease of care. They not only enhance your indoor ambiance but also improve air quality and add a touch of nature to any setting. Whether you’re a seasoned gardener or just starting out, understanding ZZ plant propagation can open a new chapter in your plant-care journey.
Why Propagate Your ZZ Plant?
- Low Maintenance: ZZ plants thrive on neglect and can withstand low light and irregular watering.
- Cost-Effective: Multiplying your plant collection at home is both fun and economical.
- Aesthetic Appeal: Their striking foliage adds a modern, stylish vibe to your décor.
- Health Benefits: ZZ plants are known for purifying the air, reducing toxins, and creating a healthier environment.
By mastering How to Propagate ZZ Plant using various techniques, you’re not only expanding your green collection but also engaging in a fulfilling, creative process. Let’s dive into the three most effective methods: water propagation, soil propagation, and propagation from leaves and bulbs.
Method 1 – Water Propagation for ZZ Plant

Water propagation is a popular method because it lets you visually track the progress of your plant’s roots as they develop. If you’re looking to learn how to propagate ZZ plant in water or how to propagate ZZ plant from leaf in water, this method might be your ideal starting point.
Getting Started with Water Propagation
Before you begin, choose a healthy section of your ZZ plant. Whether you decide to use a stem or a leaf cutting, ensure that it’s free from disease and has visible signs of strength.
Step-by-Step Process:
- Select a Healthy Cutting:
- Identify a mature leaf or a section of stem. When selecting, make sure it’s not too old or damaged.
- Prepare the Cutting:
- Using sterilized scissors or a knife, make a clean cut near the base of the chosen section.
- Allow the cut end to dry for a few hours to reduce the risk of rot.
- Prepare Your Water Container:
- Fill a clear glass jar or container with room-temperature water.
- Submerge only the cut end, ensuring that the leaf or stem is not fully immersed (this minimizes the risk of rot).
- Monitor and Change Water Regularly:
- Replace the water every three to five days to keep it fresh and oxygen-rich.
- Watch as roots begin to form after about two to three weeks.
- Transition to Soil:
- Once you see a robust network of roots, transplant your cutting into a pot with a well-draining potting mix.
Tips for Successful Water Propagation:
- Light Exposure: Place the container in a spot with bright, indirect light to encourage root growth.
- Temperature: Maintain a warm environment to speed up the rooting process.
- Observation: Keep an eye on your cutting’s progress. If you notice any signs of decay, remove the affected part immediately.
For additional guidance, you can always refer to visual tutorials on platforms like YouTube by searching for how to propagate zz plant youtube. These videos can provide you with a step-by-step visual aid, making the process even more accessible.
Method 2 – Soil Propagation for ZZ Plant

If you prefer a more traditional approach, soil propagation might be your best bet. This method provides your cutting with the natural nutrients it needs to flourish. Learn how to propagate ZZ plant in soil and experience the rewarding process of nurturing your plant from the ground up.
Soil Propagation Essentials
Soil propagation involves planting your cutting directly into a prepared potting mix. This technique simulates the natural growing conditions of your ZZ plant and can be particularly effective for those who prefer a hands-on approach.
Step-by-Step Process:
- Prepare the Potting Mix:
- Choose a high-quality, well-draining mix that includes components like peat moss, perlite, and organic compost.
- Select and Prepare the Cutting:
- Use a clean, sharp tool to make a neat cut from a healthy section of the plant.
- Allow the cut end to callous over for a few hours.
- Plant the Cutting:
- Fill a small pot with the prepared soil mix.
- Insert the cutting about an inch deep, ensuring that it has ample space to develop roots.
- Watering Routine:
- Water lightly after planting, ensuring that the soil remains moist but not waterlogged.
- Consistent, moderate watering will help establish the cutting in its new environment.
- Establishing the Cuttings:
- Place the pot in a location with bright, indirect light.
- Monitor the progress and adjust care as needed.
Propagation Soil Mix Recipe
Below is a table that outlines a simple soil mix recipe that you can use for propagating your ZZ plant:
| Ingredient | Quantity | Purpose |
|---|---|---|
| Peat Moss | 40% of the mix | Retains moisture and provides organic matter |
| Perlite or Sand | 30% of the mix | Ensures proper drainage |
| Compost or Organic Matter | 30% of the mix | Provides nutrients for growth |
This balanced mix not only supports robust root development but also minimizes the risk of overwatering—a common challenge in ZZ plant propagation.
Additional Tips for Soil Propagation:
- Light and Humidity: Ensure your plant receives bright, indirect light. Consider using a humidity tray if you’re in a dry climate.
- Temperature: Aim for a warm, stable environment to encourage faster rooting.
- Patience is Key: Soil propagation might take a bit longer than water propagation, but the end result is a well-established plant ready for future growth.
Method 3 – Propagation from Leaves & Bulbs

Another fascinating method is propagating your ZZ plant from its leaves or bulbs. This technique might seem a bit unconventional, but many gardeners have found success with it. Discover how to propagate ZZ plant from leaf or how to propagate ZZ plant from bulb and give your plant a whole new lease on life.
Propagation Techniques from Leaves and Bulbs
When you choose to propagate from leaves or bulbs, you’re tapping into the natural regenerative power of your ZZ plant. Here’s how you can do it:
Step-by-Step Process:
- Identify Suitable Leaves/Bulbs:
- Look for healthy, mature leaves or bulbs that show signs of vigor.
- Cut the Leaf/Bulb:
- Using sterilized tools, carefully cut the chosen leaf or bulb. Ensure you leave a small section attached to the stem if possible.
- Allow the cut to dry for a few hours to form a protective callus.
- Choose Your Propagation Medium:
- You can use water or a pre-moistened rooting medium. If using water, submerge the cut end only; if using soil, plant the leaf/bulb in a small pot.
- Optimal Placement:
- Place your cutting in a warm, well-lit area with indirect sunlight.
- Monitor for signs of root development over the next few weeks.
- Transitioning:
- Once a healthy root system has developed, either continue growing in your chosen medium or transfer the cutting to a more permanent pot.
Where to Cut for Best Results:
- Focus on the Stem Base:
- When propagating from the stem, it’s best to make the cut near the base where the plant’s energy is concentrated.
Quick Tips for Propagation from Leaves/Bulbs:
- Keep It Clean: Always use sterilized tools to reduce the risk of infection.
- Patience is Vital: This method might require a bit more time to see visible growth, so remain patient and consistent with your care.
- Monitor Environment: Ensure your cutting is not exposed to direct sunlight, which can cause overheating and stress.
Troubleshooting & Advanced Tips for ZZ Plant Propagation
Even with the best care, you might encounter some hiccups along the way. Understanding common issues and troubleshooting them can help you achieve success with ZZ plant propagation.
Common Issues in Propagation
Overwatering
- Problem: Excess water can lead to rot, especially in water propagation.
- Solution: Monitor water levels carefully and change the water regularly. With soil propagation, ensure the mix is well-draining.
Insufficient Light
- Problem: Low light conditions can stunt root growth.
- Solution: Place your propagating cuttings in an area with bright, indirect light. Avoid direct sunlight, which may be too intense.
Poor Cutting Technique
- Problem: Using dull or unsterilized tools can damage the plant and invite disease.
- Solution: Always use clean, sharp tools and allow cut ends to callous before propagation.
Delayed Rooting
- Problem: Sometimes, roots take longer to form than expected.
- Solution: Be patient and maintain a stable environment with proper moisture and temperature.
Advanced Tips:
- Experiment with Rooting Hormones:
- Adding a rooting hormone to your cuttings can boost the success rate, especially when propagating from leaves or bulbs.
- Mix Propagation Techniques:
- Consider starting your propagation in water and transitioning to soil once a healthy root system is visible.
- Regular Monitoring:
- Keep a close eye on your progress. Document the changes and adjust care routines based on the plant’s needs.
- Seek Expert Advice:
- Engage with gardening communities online and watch tutorials—such as those found by searching how to propagate zz plant youtube—to gather tips from experienced gardeners.
Frequently Asked Questions (FAQ) About How to Propagate ZZ Plant
Q1: Can you propagate a ZZ plant from leaves alone?
A: Yes, you can propagate a ZZ plant from leaves. However, success rates may vary. It’s generally more effective when you propagate from a section of stem or bulb. For best results, ensure the leaf is healthy and use a sterilized cutting tool.
Q2: Where should you cut a ZZ plant for propagation?
A: When propagating from a stem, make your cut near the base of the plant where the energy is concentrated. This approach helps maximize the chances of successful rooting.
Q3: How often should you water a ZZ plant during propagation?
A: Whether you’re using water or soil propagation, consistency is key. For water propagation, change the water every three to five days. For soil propagation, keep the soil moist—but not soggy—to avoid overwatering.
Q4: What are the light requirements for ZZ plant propagation?
A: ZZ plants thrive in bright, indirect light. Direct sunlight can be too harsh and may cause overheating, while too little light can slow down root development. Aim for a well-lit, indoor space that provides steady, diffused light.
Q5: How long does it take for roots to form?
A: In water propagation, you may see roots forming within two to three weeks. Soil propagation can take a bit longer, so patience and consistent care are essential.
Q6: Is it possible to propagate a ZZ plant in water and then move it to soil?
A: Absolutely. Many gardeners start with water propagation to monitor root development and then transfer the cutting to soil once a healthy root system has developed.
Conclusion: Embrace the Journey of Propagating Your ZZ Plant
By now, you’re equipped with the knowledge and practical steps needed to embark on your propagation journey. Whether you choose the clarity of water propagation, the natural support of soil, or the intriguing method of propagating from leaves and bulbs, you now understand How to Propagate ZZ Plant in ways that can suit any gardening style.
Remember, every propagation journey is unique. It might take some trial and error, but each step you take brings you closer to creating a thriving, beautiful collection of ZZ plants in your home or garden. Enjoy the process, be patient with your progress, and soon enough, you’ll be rewarded with lush greenery that symbolizes growth, resilience, and your very own gardening success.
Call-to-Action
Now it’s your turn to get your hands dirty! Choose the method that best suits your style, gather your tools, and start propagating your ZZ plant today. Share your progress with our community or leave a comment below with your success stories and questions. Don’t forget to subscribe to our newsletter for more expert tips, creative ideas, and all the latest in ZZ plant care. Happy propagating!
By following these comprehensive guidelines, you’re not only learning How to Propagate ZZ Plant but also engaging in a rewarding experience that enriches your living space. Keep this guide handy as you experiment with each technique, and remember—every green leaf is a testament to your dedication and care. Enjoy the journey and watch your ZZ plants flourish under your nurturing hands!

