Repotting your peace lily is more than just a gardening chore—it’s a transformative experience that renews your plant’s energy and breathes new life into your indoor oasis. If you’ve noticed Peace Lily Leaves Turning Yellow or felt that your Peace Lily Is Crowded, this guide will walk you through each step with care and precision. In this article, you’ll discover how to repot your peace lily with confidence, from gathering the right tools to troubleshooting common issues like peace lily repotting shock and peace lily repotting problems.
By the end of this journey, you’ll not only have a thriving Peace Lily Plant but also the knowledge to keep it flourishing for years to come. Let’s dive in!
Table of Contents
Introduction to How to Repot a Peace Lily
When you look at your peace lily, you see more than just a plant—you see a living piece of nature that brightens your home. However, as your peace lily grows, its pot can become cramped, leading to stressed roots and diminished health. Repotting is a crucial step in Peace Lily Plant Care that ensures your plant continues to receive the nutrients it needs.
Key Reasons to Repot Your Peace Lily:
- Enhanced Growth: As roots expand, a larger pot and fresh peace lily repotting soil can provide the space and nutrients needed for vigorous growth.
- Improved Soil Conditions: Over time, the soil can become compacted or depleted. Upgrading to a balanced mix helps in maintaining Peace Lily Light Requirements and moisture levels.
- Avoiding Root Rot: If you notice symptoms like how to repot a peace lily with root rot, repotting allows you to trim damaged roots and prevent further issues.
- Aesthetic Appeal: A well-repoted peace lily not only looks healthier but also elevates the decor of your space.
Remember, repotting is your chance to give your plant a fresh start. Whether you’re dealing with Peace Lily Brown Tips or simply want to rejuvenate a tired plant, follow these steps to make the process smooth and successful.
Step-by-Step Guide for How to Repot a Peace Lily
Step 1: Gather Your Materials

Before you begin, ensure you have everything you need. Being well-prepared makes the repotting process stress-free for both you and your peace lily.
What You’ll Need:
- New Pot: Choose one that’s slightly larger than the current pot and has drainage holes.
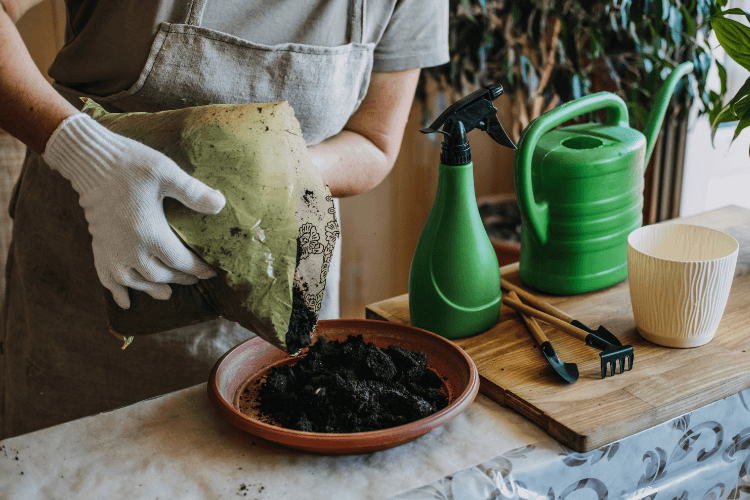
- Fresh Soil: Opt for a high-quality peace lily repotting soil or a custom mix that includes organic compost.
- Tools: Trowel, gloves, and a water can.
- Additional Additives: Consider organic compost or perlite to improve drainage if needed.
Pro Tip: A checklist can be very useful here—tick off each item as you gather it to ensure nothing is missed.
By preparing all your materials in advance, you set the stage for a smooth repotting experience that minimizes stress on your plant and ensures it gets the best care possible.
Step 2: Assess the Current Health of Your Peace Lily

Before moving your plant, take a close look at its current state. Understanding the health of your peace lily is essential for a successful repot.
What to Look For:
- Visual Symptoms:
- Peace Lily Leaves Turning Yellow indicate that your plant might be struggling.
- Brown, crispy tips or edges, known as Peace Lily Brown Tips or Peace Lily Brown Leaves, suggest stress.
- Root Inspection:
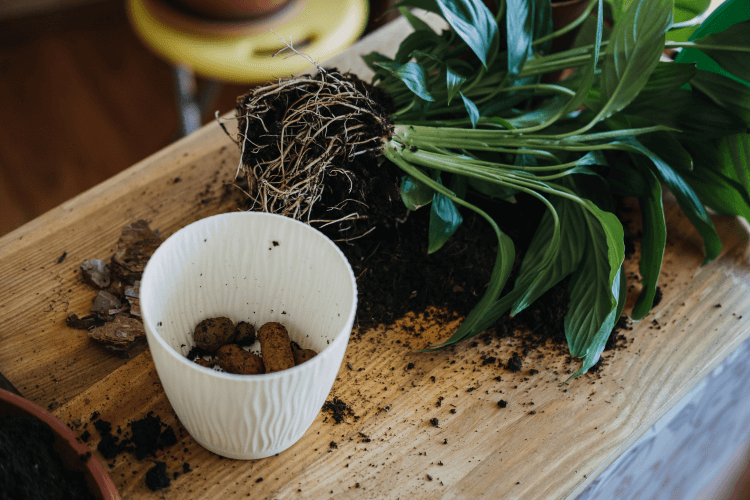
- Gently remove the plant from its pot to check if the roots are congested or suffering from rot.
- Issues like how to repot a peace lily with root rot require immediate attention.
Remember: Even if your peace lily is exhibiting some distress, repotting can be a restorative step. Identifying and trimming damaged roots can prevent further deterioration.
By thoroughly assessing your plant’s condition, you not only protect it during the process but also create an opportunity to address underlying issues.
Step 3: Carefully Remove Your Peace Lily

Removing your peace lily from its current pot must be done with care to avoid causing further stress. This step is crucial for ensuring that the plant’s roots remain intact and healthy.
Follow These Steps:
- Loosen the Soil:
- Gently tap the sides of the pot to break up the compacted soil.
- If necessary, run a knife along the inside edges to loosen stubborn soil.
- Lift the Plant:
- Carefully slide your hand behind the base of the plant and lift it out, ensuring you keep as many roots as possible intact.
- Examine the Roots:
- Look for any signs of rot or overcrowding.
- Trim off any damaged or darkened roots using sterilized scissors.
Tips for Minimizing Stress:
- Work in a calm, well-lit area.
- Keep the roots moist during the entire process.
- If you’re repotting indoors, ensure the room temperature is stable.
By handling your peace lily with gentle care, you reduce the chances of peace lily repotting shock and set the stage for a smooth transition to its new home.
Step 4: Choose the Right Pot and Peace Lily Repotting Soil

The selection of the right pot and soil mix is essential for the long-term health of your peace lily.
How to Choose:
- Pot Size:
- Select a pot that is one size larger than the current one. This extra space allows for growth without overwhelming the roots.
- Drainage:
- Ensure the new pot has drainage holes to prevent waterlogging, a common cause of root rot.
- Soil Mix:
- Use a high-quality peace lily repotting soil or prepare your own mix. A good soil mix should retain moisture yet provide sufficient drainage to maintain proper Peace Lily Light Requirements.
Creating the Ideal Soil Mix:
- Components to Consider:
- High-Quality Potting Soil: Provides the basic nutrients and structure.
- Perlite or Pumice: Added at about 20% of the mix, it improves drainage.
- Organic Compost: Enhances fertility and overall plant health.
- Coconut Coir or Peat Moss: Ensures soil structure and aeration.
Below is a table that outlines an ideal recipe for your peace lily’s new home:
Table: Ideal Soil Mix for How to Repot a Peace Lily
| Ingredient | Recommended Amount | Purpose/Benefit |
|---|---|---|
| High-quality potting soil | 60% | Provides essential nutrients and retains moisture |
| Perlite or pumice | 20% | Improves drainage and prevents waterlogging |
| Organic compost | 10% | Enhances fertility and promotes healthy growth |
| Coconut coir or peat moss | 10% | Maintains soil structure and ensures aeration |
This custom blend will provide a balanced environment, ensuring your peace lily has the best conditions to thrive.
Step 5: Repot Your Peace Lily

Now comes the hands-on part: placing your peace lily into its new home. Follow these steps to repot your plant correctly.
Step-by-Step Process:
- Prepare the Pot:
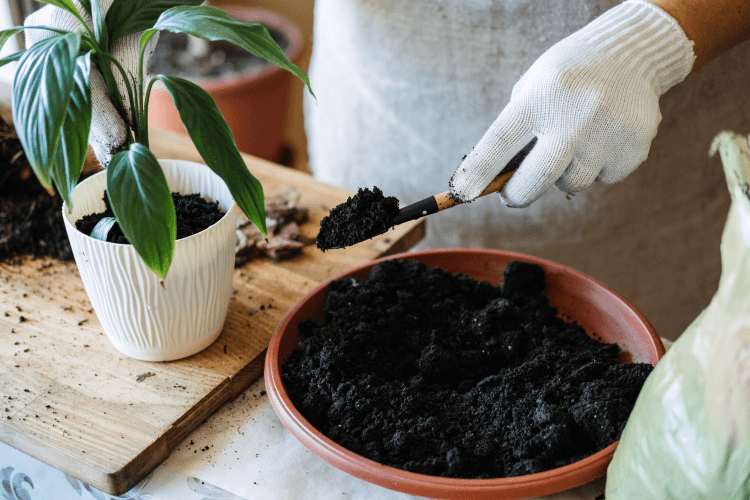
- Add a layer of the prepared soil mix to the bottom of your new pot.
- Position the Plant:
- Place your peace lily in the center of the pot.
- Ensure that the roots spread out naturally and aren’t cramped.
- Backfill with Soil:
- Gently fill around the plant with more soil, ensuring there are no air pockets.
- Avoid overfilling—leave space for water circulation.
- Settle the Plant:
- Firmly press down the soil around the roots to provide support and eliminate any gaps.
Additional Considerations:
- Timing:
- If your peace lily is currently flowering, note that repotting can be done even during this phase; however, extra care is needed.
- Keywords such as can you repot peace lily while flowering indicate that while repotting is possible, you should minimize disturbance to the bloom.
- Secondary Keywords:
- This step is essential for those wondering how to repot a peace lily plant effectively.
Following these steps carefully will help ensure that your plant adjusts quickly and continues to grow healthily in its new environment.
Step 6: Post-Repotting Care and Fertilization
After repotting, proper aftercare is crucial to help your peace lily settle into its new home.
Essential Aftercare Guidelines:
- Watering:
- Water your plant thoroughly after repotting, but ensure you do not overwater. A good soak followed by proper drainage is ideal.
- Light Conditions:
- Place your peace lily in a location with bright, indirect sunlight. Avoid harsh direct light that might scorch the leaves.
- Temperature and Humidity:
- Keep the plant in a stable environment. Peace lilies thrive in moderate humidity and a consistent indoor temperature.
- Fertilization:
- About a month after repotting, introduce a balanced fertilizer formulated for indoor plants. This will support steady growth and prevent issues like Peace Lily Not Flowering.
Quick Tip:
Monitor your plant closely for the first few weeks. If you observe any signs of peace lily repotting shock or unexpected stress, adjust the watering schedule and light exposure accordingly.
Using a gentle, gradual approach during the post-repotting phase can make all the difference in your peace lily’s recovery and long-term vitality.
Step 7: Troubleshooting and Additional Tips
Even with careful repotting, issues can sometimes arise. This section addresses common concerns and offers extra tips to ensure your peace lily continues to thrive.
Common Issues and Solutions:
- Troubleshooting Repotting Shock:
- If your plant shows signs of stress such as drooping or discolored leaves, it might be experiencing repotting shock. Give it time to adjust and ensure it’s in a well-lit, stable environment.
- Addressing Root Rot:
- Should you notice persistent issues like how to repot a peace lily with root rot, consider re-examining your soil mix and ensuring the pot’s drainage is not compromised.
- Handling Crowded Roots:
- Overcrowding can lead to stunted growth. If the roots appear tightly wound, gently tease them apart before replanting.
- Dividing Your Peace Lily:
- For larger plants, you might want to consider splitting them. Techniques for dividing peace lily or how to split a peace lily allow you to propagate new plants while ensuring your original remains healthy.
Advanced Tips:
- Regular Maintenance:
- Schedule repotting every 1-2 years to avoid issues related to outdated soil and root congestion.
- Indoor vs. Outdoor Considerations:
- If you’re wondering how to repot a peace lily indoors, remember that indoor environments require careful attention to light and humidity.
- Secondary Keywords in Action:
- Whether you’re concerned about peace lily repotting problems or simply need guidance on repotting a peace lily plant, the key is to observe and adapt your care routine based on your plant’s responses.
By understanding these troubleshooting steps and incorporating regular maintenance into your routine, you ensure that your peace lily remains a vibrant, healthy focal point in your home.
FAQ Section: How to Repot a Peace Lily Questions Answered
Q1: What signs indicate that my Peace Lily needs repotting?
A: Look for clues such as Peace Lily Leaves Turning Yellow, Peace Lily Brown Tips, and a cramped root system. When you observe these signs along with slowed growth, it’s time to consider repotting. Regular checks help you know when to repot a peace lily and maintain optimal Peace Lily Plant Care.
Q2: Can you repot a peace lily while it’s flowering?
A: Yes, you can repot a peace lily even during its blooming phase, though it requires extra caution. If you ask, can you repot peace lily while flowering, be sure to minimize disturbance to the flowers and handle the roots gently.
Q3: How do I address issues like root rot or repotting problems?
A: If you suspect how to repot a peace lily with root rot or notice peace lily repotting problems, remove and trim any affected roots before repotting with a fresh, well-draining soil mix. This will help restore your plant’s vitality and prevent further deterioration.
Q4: Are Peace Lilies toxic to pets?
A: Yes, Are Peace Lilies Toxic to Cats and Are Peace Lilies Toxic to Dogs are common concerns. If you have pets at home, make sure to place your peace lily in an area that is inaccessible to them to avoid accidental ingestion.
Q5: What if my peace lily shows signs of repotting shock?
A: Repotting shock is often temporary. Keep your plant in a stable environment with indirect light and monitor its water needs closely. Over time, as it adjusts to its new home, the symptoms should subside.
Bonus FAQ:
Q: How often should I repot my peace lily?
A: Typically, repotting every 1-2 years is ideal to ensure the soil remains fresh and the roots have enough space to grow.
These FAQs cover the essential concerns and provide quick solutions to common questions about repotting your peace lily.
Conclusion
Wrapping Up Your Journey to How to Repot a Peace Lily
Repotting your peace lily is a rewarding experience that not only addresses issues like Peace Lily Repotting Problems and Peace Lily Leaves Turning Brown, but also rejuvenates your plant’s overall health. Let’s recap the key steps:
- Gather Your Materials: Make sure you have the right tools, including fresh peace lily repotting soil.
- Assess Your Plant’s Health: Check for signs like Peace Lily Yellow Leaves and root congestion.
- Carefully Remove and Inspect: Gently extract your peace lily, trimming any damaged roots.
- Choose the Right Pot and Soil Mix: Use a pot with proper drainage and a balanced soil mix.
- Repot with Precision: Follow a step-by-step process to place your plant in its new home.
- Post-Repotting Care: Ensure your peace lily gets adequate water, indirect light, and the right temperature.
- Troubleshoot and Maintain: Address common issues like peace lily repotting shock and prepare for future maintenance.
As you embark on this repotting journey, remember that your peace lily’s transformation is a reflection of the care and attention you invest. Your hands-on approach not only enhances your plant’s health but also deepens your connection to nature.
A Final Call to Action
Now that you know How to Repot a Peace Lily in 7 quick, effective steps, it’s time to put your newfound knowledge into practice. Take a moment to gather your materials and give your peace lily the fresh start it deserves. If you’ve enjoyed this guide, share your success stories or leave a comment below with any questions you might have. Your journey to a thriving indoor garden starts here—embrace it, and let your green space flourish!
By following this comprehensive guide, you are now equipped with the know-how to tackle repotting with confidence. Whether you’re dealing with a Variegated Peace Lily, trying to resolve Peace Lily Propagation concerns, or simply enhancing your Peace Lily Plant Care, these steps have you covered. Remember, the goal is to create a nurturing environment that fosters growth and ensures your plant remains a vibrant focal point in your home.
Take the leap today—your peace lily is waiting for that refreshing change. Happy repotting, and may your indoor garden continue to thrive!
In summary, this guide has walked you through each phase of repotting your peace lily, from the initial preparation to post-repotting care and troubleshooting. With clear instructions, practical tips, and an emotionally resonant approach, you now have a roadmap to transform your indoor garden experience. Whether you’re repotting for the first time or fine-tuning your techniques, your efforts will yield a healthy, flourishing peace lily that brightens your home every day.
Remember: every step you take in caring for your plant contributes to its long-term health and beauty. So, gear up, get your hands dirty, and enjoy the journey of nurturing your peace lily. If you ever feel unsure, revisit this guide or explore further resources on Peace Lily Care. Your plant’s future is bright, and it all starts with the simple act of repotting.
By embracing these practices, you join a community of passionate plant lovers who understand that even the simplest tasks can lead to extraordinary growth. Don’t wait—start repotting your peace lily today and experience the joy of watching it bloom in all its glory.
Feel free to bookmark this guide for future reference and share it with others who might need a little help in their plant care journey. Your engagement not only spreads knowledge but also cultivates a community of care and green living.
Happy repotting and nurturing, and here’s to many more thriving plants in your home!
Now that you’re equipped with all the essential steps and insights on How to Repot a Peace Lily, it’s time to act. Dive into your gardening project, and let your peace lily’s transformation be the first of many rewarding experiences in your plant care journey.

