
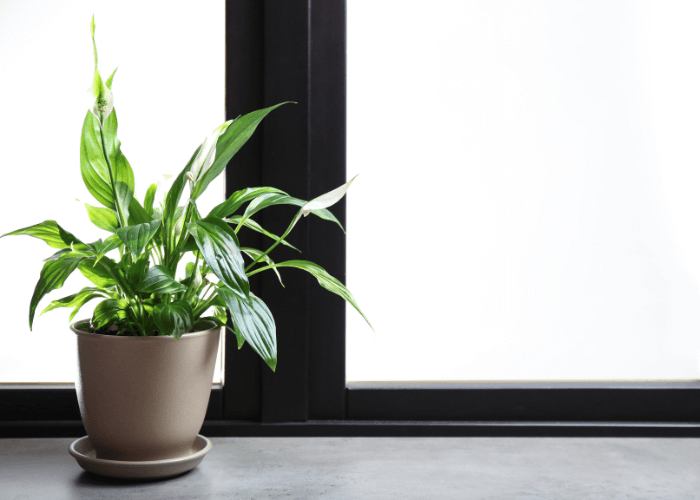
Have you ever found yourself captivated by the graceful elegance of a peace lily? These stunning houseplants, with their lush green leaves and pristine white blooms, are more than just decorative. They symbolize peace, healing, and hope. But keeping them in perfect condition requires a bit of knowledge and care. Whether you’re a seasoned plant parent or just beginning your indoor gardening journey, mastering Peace Lily Care will help you maintain a vibrant, healthy plant while adding serenity to your space.
In this guide, you’ll learn everything you need to know about growing a healthy peace lily—from light and watering needs to troubleshooting common issues. Let’s dive in!
Table of Contents
Understanding the Peace Lily Plant (Spathiphyllum)
Key Characteristics
The peace lily (Spathiphyllum) is cherished for its sophisticated look and practicality. As an air-purifying plant, it improves indoor air quality while being relatively low-maintenance.
- Varieties: From the classic Spathiphyllum wallisii to Variegated Peace Lilies, there’s a variety to suit every home.
- Life Cycle: Peace lilies bloom intermittently, with flowers lasting several weeks.
Beyond its aesthetic appeal, the Peace Lily Plant symbolizes tranquility, making it a popular gift.
The Meaning Behind Peace Lilies
The peace lily’s white spathes resemble a white flag, symbolizing surrender and peace. They’re often associated with harmony and are commonly used in healing spaces.
Creating the Ideal Environment for Your Peace Lily Care
Providing the right environment is crucial for maintaining vibrant and healthy peace lilies. These plants may seem low-maintenance, but their true beauty shines when they’re given the conditions they need to thrive. Mastering Peace Lily Care involves striking a balance between light, temperature, humidity, and soil quality. Here’s everything you need to know:
Light Requirements for Peace Lily Care
Peace lilies are well-loved for their ability to adapt to indoor lighting conditions, making them perfect for homes and offices. However, they have preferences that directly influence their growth and flowering.
- Ideal Light Conditions: These plants thrive in bright, indirect sunlight. Too much direct sunlight can scorch their leaves, causing discoloration and damage. On the other hand, insufficient light can prevent blooming and lead to a leggy appearance.
- Low-Light Adaptability: Peace lilies are among the few plants that tolerate low-light conditions. While they may survive, their blooming potential diminishes significantly. If you notice your plant’s growth slowing down, consider moving it closer to a light source.
- Practical Tip: Rotate your plant every few weeks to ensure all sides receive equal light, promoting balanced growth.
Soil Essentials for Peace Lily Care
The soil you choose plays a significant role in your peace lily’s overall health. Poor soil conditions can lead to common problems like root rot and nutrient deficiencies.
- Soil Type: Peace lilies prefer a well-draining, slightly acidic potting mix with a pH between 5.8 and 6.5. A mix containing peat moss, perlite, and organic compost works well.
- Drainage: Ensure the pot has drainage holes to prevent water from pooling at the bottom, which can lead to soggy roots.
The Right Watering Practices
Watering is one of the most critical aspects of Peace Lily Care, as these plants are highly sensitive to both overwatering and underwatering.
- When to Water: Check the top inch of soil—if it feels dry, it’s time to water. Peace lilies are known to droop dramatically when thirsty but recover quickly after watering.
- Water Quality: Use room-temperature, filtered, or distilled water to avoid chlorine or fluoride buildup, which can cause Peace Lily Brown Tips.
Pro Tip: If you’re unsure, err on the side of slightly underwatering. Peace lilies are more tolerant of drought than over-saturation.
Temperature and Humidity Preferences
As tropical plants, peace lilies are accustomed to warm, humid climates. Recreating these conditions indoors ensures your plant stays happy and healthy.
- Temperature Range: Maintain temperatures between 65–85°F (18–29°C). Avoid exposing your peace lily to cold drafts or sudden temperature fluctuations.
- Humidity Levels: High humidity is ideal for peace lilies. If your home is dry, especially during winter, increase humidity by:
- Using a humidifier.
- Placing the pot on a pebble tray filled with water.
- Grouping your peace lily with other houseplants to create a micro-humid environment.
Growing Peace Lilies in Water
An alternative to soil-based cultivation is growing your peace lily in water. This unique method not only simplifies maintenance but also showcases the plant’s roots, making it a visually stunning centerpiece.
- Setup: Place the plant’s roots in a vase filled with water, ensuring the base of the plant is above the waterline to prevent rot.
- Maintenance: Replace the water weekly and add liquid nutrients monthly to provide essential minerals.
By giving attention to these environmental factors, you’ll create the ideal conditions for your peace lily to flourish. Remember, the key to successful Peace Lily Care lies in consistency and observation. If you meet its needs, your peace lily will reward you with lush foliage and elegant white blooms.
Advanced Peace Lily Care Tips
Once you’ve mastered the basics of Peace Lily Care, you may want to explore advanced techniques to help your peace lily truly thrive. These methods are ideal for dedicated plant enthusiasts who want their plants to look vibrant, bloom frequently, and grow to their full potential. Here are some expert strategies to elevate your care routine.
1. Fertilizing for Maximum Growth and Blooms
While peace lilies are not heavy feeders, providing them with occasional nourishment encourages healthier foliage and frequent flowering.
- Type of Fertilizer: Use a balanced liquid fertilizer, such as a 10-10-10 or 20-20-20 formula, diluted to half strength. Avoid over-fertilizing, as it can cause salt buildup and Peace Lily Yellow Leaves.
- Feeding Schedule: Feed your peace lily every 6–8 weeks during the growing season (spring and summer). Pause fertilization in fall and winter when the plant enters dormancy.
- Organic Alternatives: Compost tea or diluted fish emulsion can also provide essential nutrients without the risk of chemical buildup.
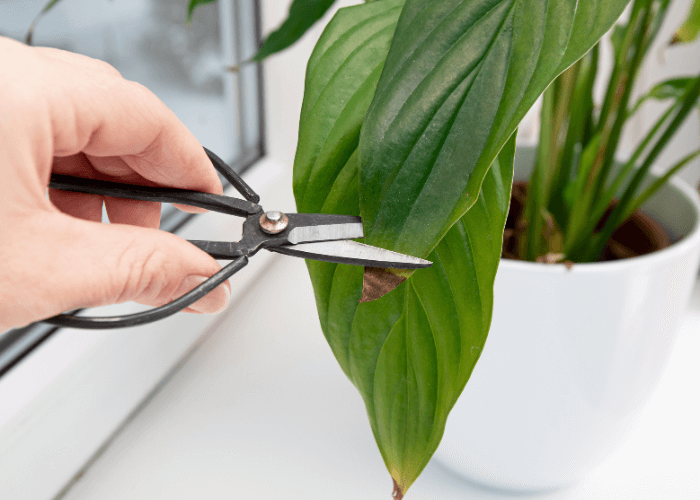
2. Pruning for a Healthier, Neater Look
Regular pruning helps your peace lily look its best and prevents common problems like pests or fungal infections.
- Removing Dead Leaves: Trim off yellow or brown leaves close to the base using clean, sharp scissors.
- Spent Blooms: Cut away faded flowers to encourage the plant to focus its energy on producing new blooms.
Pro Tip: Sterilize your pruning tools before and after use to prevent the spread of disease.
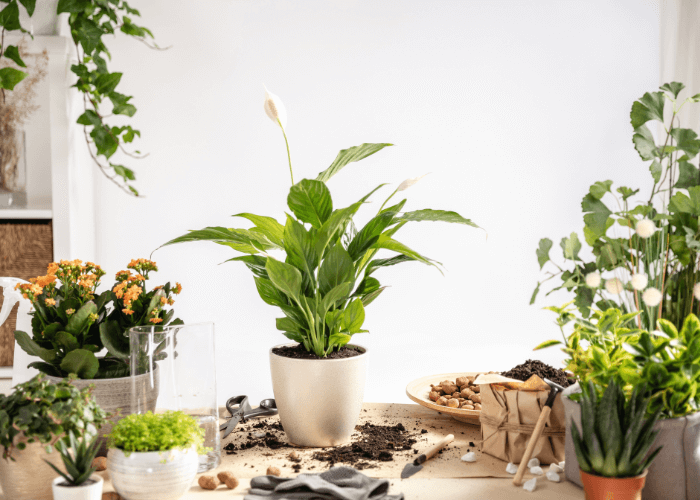
3. Repotting for Long-Term Health
Peace lilies typically outgrow their pots every 1–2 years. Knowing how to repot them properly ensures they continue to thrive.
- Signs It’s Time to Repot: Roots emerging from drainage holes, compacted soil, or a plant that dries out too quickly are indicators that your peace lily is crowded.
- Choosing a New Pot: Select a pot that is 1–2 inches larger in diameter than the current one and has adequate drainage.
- Repotting Process:
- Gently remove the plant from its pot, being careful not to damage the roots.
- Loosen compacted roots and trim away any that are dead or rotting.
- Fill the new pot with fresh potting mix, place the plant at the same depth as before, and water thoroughly.
4. Pest and Disease Management
While peace lilies are generally resilient, they can occasionally encounter issues with pests or diseases.
- Common Pests: Watch for spider mites, mealybugs, and aphids. Use insecticidal soap or neem oil to treat infestations.
- Fungal Problems: Overwatering can lead to root rot and fungal diseases. If you notice blackened roots or wilting, reduce watering and consider using a fungicide.
- Preventive Measures:
- Keep the foliage dry during watering.
- Wipe leaves regularly to remove dust and improve photosynthesis.
5. Encouraging Peace Lily Blooms
While peace lilies are famous for their elegant white blooms, they sometimes stop flowering due to suboptimal conditions. Here’s how to encourage blooms:
- Adjust Light Levels: Provide bright, indirect sunlight. If your plant is in a dimly lit spot, move it closer to a window but avoid direct exposure.
- Mimic Natural Growth Cycles: Peace lilies bloom in response to changes in light and temperature. Simulate this by slightly lowering the temperature at night during winter.
- Use Bloom Boosters: Occasionally, use a fertilizer high in phosphorus (e.g., 15-30-15) to promote flowering.
6. Experimenting with Variegated Peace Lilies
If you own a variegated peace lily, its care requires slight adjustments:
- Light Requirements: Variegated varieties need more light to maintain their distinctive patterns, but direct sunlight should still be avoided.
- Fertilization: Provide slightly less fertilizer to avoid overwhelming the plant, which can cause leaf discoloration.
7. Water Propagation Techniques
For plant enthusiasts who enjoy propagating peace lilies, water propagation is an exciting and easy method.
- How to Propagate:
- Remove a healthy offset or division from the parent plant.
- Place the roots in a glass jar filled with water, ensuring the leaves remain above the waterline.
- Change the water weekly to keep it fresh.
- Transition to Soil: Once the roots grow at least 2–3 inches long, transfer the propagated peace lily to a pot with soil.
8. Seasonal Adjustments
Peace lilies have different needs throughout the year. Tailor your care routine to the seasons:
- Spring and Summer: Increase watering and fertilizing frequency as the plant actively grows.
- Fall and Winter: Reduce watering and allow the plant to rest. Keep it away from cold drafts and heating vents.
By integrating these advanced tips into your routine, you can elevate your Peace Lily Care to an expert level. With consistent attention and thoughtful care, your peace lily will reward you with lush foliage, elegant blooms, and a stunning presence in your home.
Common Peace Lily Problems and Solutions
While peace lilies are relatively low-maintenance plants, they can sometimes encounter issues that may affect their health and appearance. Understanding these problems and their solutions is key to ensuring your plant thrives. Here’s a detailed guide to the most common Peace Lily Care challenges and how to address them effectively.
1. Yellowing Leaves
Yellow leaves can be alarming, but the issue is often easy to resolve once the underlying cause is identified.
Causes:
- Overwatering: The most common cause of Peace Lily Leaves Turning Yellow is excessive watering, leading to root rot.
- Underwatering: Lack of water can also cause yellowing, as the plant struggles to hydrate itself.
- Nutrient Deficiency: A lack of essential nutrients, such as nitrogen, can lead to pale or yellow leaves.
Solutions:
- Allow the top inch of soil to dry out before watering again.
- Use a balanced fertilizer during the growing season to provide the necessary nutrients.
- Check the roots for rot and repot in fresh soil if needed.
2. Brown Leaf Tips
Brown tips on leaves can detract from the plant’s beauty and are often a sign of environmental stress.
Causes:
- Low Humidity: Peace lilies thrive in humid conditions, and dry air can cause leaf tips to brown.
- Overfertilization: Excess fertilizer can lead to salt buildup, burning the tips of the leaves.
- Tap Water: Chemicals like chlorine and fluoride in tap water may cause browning.
Solutions:
- Increase humidity by misting the leaves or placing the plant near a humidifier.
- Use distilled or rainwater to avoid chemical damage.
- Flush the soil monthly to remove salt buildup from fertilizers.
3. Drooping Leaves
Drooping leaves can make your peace lily look lifeless, but the issue is typically reversible.
Causes:
- Underwatering: The most common cause of drooping is a lack of water.
- Overwatering: Surprisingly, overwatering can also cause drooping by suffocating the roots.
- Root Bound: If your peace lily is crowded in its pot, the roots may struggle to absorb water effectively.
Solutions:
- Water the plant thoroughly if the soil feels dry.
- Ensure the pot has proper drainage to prevent overwatering.
- Repot the plant if the roots have outgrown the container.
4. Lack of Blooms
A peace lily that isn’t flowering can be disappointing, especially when you’re eager to see its stunning white blooms.
Causes:
- Insufficient Light: Peace lilies need bright, indirect light to bloom.
- Improper Feeding: A lack of phosphorus in the soil may inhibit flowering.
- Age of Plant: Young plants may take time to mature before blooming.
Solutions:
- Relocate the plant to a spot with ample indirect sunlight.
- Use a bloom-boosting fertilizer high in phosphorus.
- Be patient with younger plants, as they will eventually flower with proper care.
5. Pests
Although peace lilies are generally pest-resistant, they can occasionally attract unwanted visitors.
Common Pests:
- Spider Mites: Cause fine webbing and yellow specks on leaves.
- Mealybugs: Appear as white, cotton-like spots.
- Aphids: Cluster on new growth, causing leaves to curl or discolor.
Solutions:
- Wipe leaves with a damp cloth to remove pests manually.
- Spray the plant with insecticidal soap or neem oil for persistent infestations.
- Isolate the plant from others to prevent the spread of pests.
6. Root Rot
Root rot is a serious problem that can threaten the health of your peace lily.
Causes:
- Overwatering: Excess water suffocates the roots, leading to decay.
- Poor Drainage: Soil that doesn’t drain well can trap moisture around the roots.
Solutions:
- Check for black, mushy roots and trim them with sterilized scissors.
- Repot the plant in fresh, well-draining soil.
- Water only when the top inch of soil feels dry.
7. Leaves Turning Brown
Brown leaves can be a symptom of environmental stress or improper care.
Causes:
- Excessive Sunlight: Direct sunlight can scorch the leaves, causing brown patches.
- Underwatering: Dehydrated plants may develop brown, crispy edges.
Solutions:
- Move the plant to a location with bright, indirect light.
- Water consistently to keep the soil slightly moist.
8. Wilting Despite Proper Watering
If your peace lily wilts even after you’ve watered it, the issue might lie elsewhere.
Causes:
- Poor Drainage: Waterlogged soil can suffocate the roots.
- Temperature Stress: Extreme cold or heat can shock the plant.
Solutions:
- Ensure the pot has adequate drainage holes.
- Keep the plant in a room with temperatures between 65–80°F (18–27°C).
9. Crowded Roots
A peace lily with crowded roots may struggle to grow and absorb nutrients effectively.
Signs:
- Roots emerging from the pot’s drainage holes.
- Soil dries out very quickly after watering.
Solution:
- Repot the plant into a slightly larger container with fresh soil.
By addressing these issues proactively, you’ll master the art of Peace Lily Care and enjoy a healthy, thriving plant that brightens your home.
Propagation: Growing Your Peace Lily Family
Propagating peace lilies is a simple and rewarding way to grow your plant collection or share their beauty with others. The best method for propagation is division, which ensures the new plants inherit the strong traits of the parent peace lily.
Step-by-Step Guide to Propagation
- Choose the right time: The best time to propagate a peace lily is during spring or early summer, when the plant is in its active growth phase.
- Prepare the plant: Gently remove the peace lily from its pot and brush away excess soil from the roots.
- Identify divisions: Look for natural separations in the root clump. Each division should have at least 2-3 healthy leaves and a portion of the root system.
- Separate carefully: Use your hands or a clean knife to divide the clumps, ensuring minimal root damage.
- Replant the divisions: Place each division into a small pot filled with fresh, well-draining soil. Ensure the crown (where the stems meet the roots) sits slightly above the soil line.
- Water thoroughly: After planting, water the divisions to help them establish in their new pots.
Tips for Successful Propagation
- Keep the newly potted divisions in a warm, humid environment to reduce transplant shock.
- Avoid direct sunlight for the first few weeks, as the new plants need time to adjust.
- Use a diluted fertilizer after a month to support growth.
By following these steps, you can enjoy an ever-growing family of peace lilies and even gift them to friends or family as thoughtful, symbolic presents.
Frequently Asked Questions About Peace Lily Care
- What Are the Key Characteristics of Peace Lily Plants?
Peace lilies are tropical plants known for their lush green foliage and white spathes. They thrive indoors and symbolize peace and harmony. - How Do I Take Care of a Peace Lily Indoors?
Provide indirect sunlight, water weekly, and maintain high humidity. Avoid overwatering and keep it away from drafts. - How to Care for a Peace Lily That Is Dying?
Identify the issue (overwatering, low light, etc.), address it, and prune damaged leaves to encourage recovery. - What Are the Signs My Peace Lily Needs Repotting?
Roots growing out of the pot’s drainage holes or the soil drying out too quickly are key indicators. - Are Peace Lilies Safe Around Pets?
No, peace lilies can be toxic to cats and dogs. Keep them in pet-free areas. - Are Peace Lilies Toxic to Cats?
Yes, peace lilies are toxic to cats due to calcium oxalate crystals, causing symptoms like drooling, vomiting, and swelling. Seek veterinary care immediately if ingested. - Are Peace Lilies Toxic to Dogs?
Yes, peace lilies are toxic to dogs due to calcium oxalate crystals. If ingested, they can cause symptoms like drooling, vomiting, mouth swelling, and difficulty swallowing. - How to care for a peace lily plant indoors?
Place your peace lily in a spot with bright, indirect light and maintain consistent watering to keep the soil slightly moist but not soggy. Use well-draining soil and ensure proper humidity levels by misting or using a humidifier. - Why is my peace lily not flowering?
Peace lilies need bright, indirect light to bloom. Ensure they’re not in a low-light area and fertilize regularly during the growing season. - How to repot a peace lily?
Repot your peace lily every 1-2 years or when it becomes root-bound. Use fresh soil and a pot that is 1-2 inches larger in diameter than the current one. Follow the steps outlined in the “How to Repot a Peace Lily” section for best results.
Conclusion
Caring for a peace lily can be incredibly rewarding. With proper Peace Lily Care, your plant will thrive, adding beauty and tranquility to your home. By following these tips, you’ll enjoy a lush, healthy plant that enhances your indoor space.
Call-to-Action: Share your peace lily care tips or challenges in the comments below. Let’s grow our indoor gardening community together! 🌱